This tutorial applies to the old MSpaint!
After Windows 7, MSpaint changed and is no longer right for making crisp pixel art.
Simply download PaintXP and run it when you want to do pixel art!
Formats and Saving
The four main image formats used on computers are bmp (bitmap), gif, jpg and png.
- BMP files are lossless but have big file sizes (upto ten times the size of an equivalent jpg or png) and take far too long to load when used as webgraphics. BMP is best used for images that are currently being edited, that way you are sure that they won't lose any information but when you have finished an image, you'll need to choose which format from GIF, JPG and PNG you are going to use to display and share your image.
MSpaint saves opened GIF files and Giffy converted BMPs as 256 color BMPs by default which means that you will lose many colors! Choose to save your image as a 24bit BMP instead by selecting that option from the scrolldown menu that is underneath the name field.
- GIF files are for animations and pixel creations. They can have a maximum of 256 colors so this is not suitable for photos or multicolored images (images with a gradual fading color -a gradient- for example). MSpaint does not save GIF files properly, instead of letting it use any 256 colors, it converts your colors to a set palette of 256 colors from what was known as the websafe palette. It also doesn't save with transparency. It's best to save your files as BMP then use Giffy (or another converter) to convert them to GIF format and add transparency.
This image was saved with MSpaint » 
This image was saved with Giffy » 
- PNG files are lossless, they don't blur or get messy when you save them but they have a much smaller file size (loading time) then BMP. IN MSpaint, you can't save PNGs with transparency but other programs such as the GIMP can give PNGs transparency and even fading transparency (in opera and firefox only). PNGs are ideal for small to medium pictures with many colors or for images that contain a lot of red colors.
For pictures that need to load fairly fast such as layout images then it might be best to use a converter to get a JPG file instead if the size time of your graphics is higher than 200ko because that takes a long time to load for people with small connections.
- JPG files are the most used format. They are great for multicolor pictures such as photos. When editing a JPG, it's best to save it as a BMP until you are ready to display it. JPGs can be compressed with more or less information but beware: they can be lossy, especially when dealing with red colors. The more you compress a JPG file then the more jagged and blurry it will get. To save JPGs from BMPs or PNGs, you can use free software such as paint.net or the GIMP.
How to Use Giffy
Your screencapture or MSpaint image will be in BITMAP format which is big and takes a long time to load on the internet...
To compress it into a GIF format you can use GIFFY. [Download]
Giffy is a freeware program (ie you can download it and use it for free)
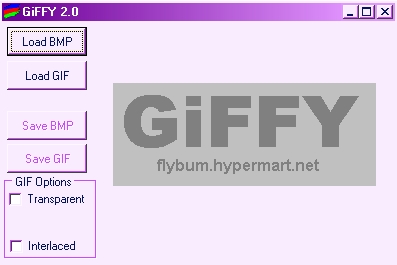
This is what Giffy looks like:
It can make your MSpaint Bitmap Images into quick loading Gifs
and it can also make Gifs into Bitmaps so you can edit them with MSpaint
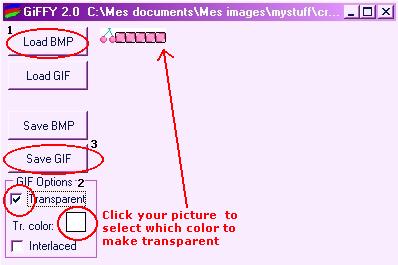
Here's how
1-Load your Bitmap picture (this could be your blinkie or your pixel drawing)
2-Choose if you want a color to be transparent
3-Save as a GIF!
How to Use Unfreeze
Unfreeze is a teeny tiny wonderful gif animation program
Just drag and drop your gif files and make animations ! [Download]
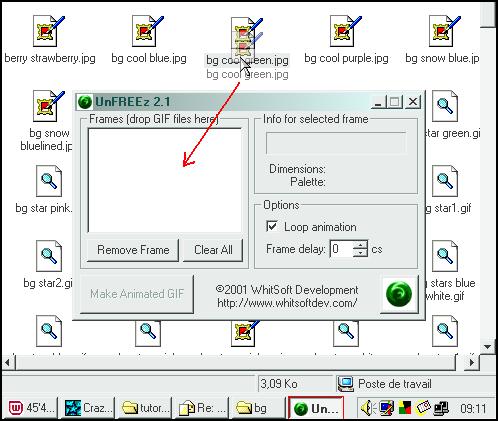
This is what unfreeze looks like:
(the colors will change depending on your desktop settings)

Here's how to use it
1-Go to the folder containing your gif files (the ones you wish to animate)
2-Make sure your folder's "viewing" style is not miniatures/thumbnails
3-Load/start the Unfreeze program
4-Drag the files into the unfreeze main frame
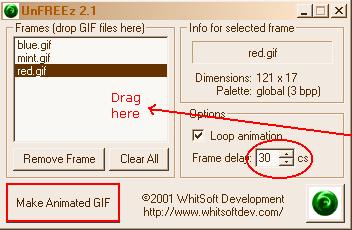
5-Choose looping and frame delay (usually 10-40)
6-Press animate gif! Voila!
This tutorial applies to the old MSpaint!
After Windows 7, MSpaint changed and is no longer right for making crisp pixel art.
Simply download PaintXP and run it when you want to do pixel art!
How to use Microsoft Paint
MSpaint is a basic and easy to use image editor. You can make anything from pixel creations to banners or layouts!
The basic tools
- Selector tools are for selecting, cutting and pasting parts or all of your image. Remember to click the transparent or solid option in the advanced tools box below. This can make any parts of your images that are the same color as the BGcolor transparent.
- Eraser either replaces any areas touched with the BGcolor when you use the left mouse button or it can replace only areas that are the same as FGcolor with the BGcolor when using the right mouse button.
- Fill (or floodfill) is for filling large areas with a color.
- Dropper is for selecting a color from an image.
- Zoom is for detailed retouching. View » Zoom » Minature shows a miniviewer (great for pixelart)
- Pencil draws a single pixel path.
- Brush draws a path that can be from 2 to 8px wide. In the advanced tool box you can choose different basic brush types.
- Spraypaint draws a patchy circular path from 9 to 25 px wide
- Text can only be used when the zoom is off. Go to View » Text Toolbar to bring up a toolbar where you can choose a font and size. All fonts are aliased so it's best to work with pixel or standard fonts. In the advances tool box you can choose between transparent or solid. Solid will give your text a rectangular background filled with the BGcolor.
- Line and Curve do exactly what their name says.
- Shapes: Rectangle, Polygon, Ellipse and Rounded rectangle. Press SHIFT to get a perfect circle or square.
In the advanced tool box, the first option draws an empty border of a shape, the second option draws a solid shape of BGcolor with a border of FGcolor, the third option draws a borderless solid shape of BGcolor.
- Keyboard shortcuts:
CTRL+C (copy), CTRL+V (paste), CTRL+A (select all), CTRL+X (cut), CTRL+S (save), CTRL+Z (undo)
CTRL+R (rotate), CTRL+W (skew), CTRL+I (invert colors), CTRL+ E (image properties), CTRL+G (grid).
The PRINT SCREEN key on your keyboard will take a snapshot of anything on your screen.
To use it: Open MSpaint, choose the select tool, right click and choose 'paste' to save it.
Colors
- The foreground (FG) color is the top square of the two. The background (BG) color is the bottom one.

To change the FGcolor, LEFT click on a color or LEFT click to select a color from an image with the dropper tool.
To change the BGcolor, RIGHT click on a color or RIGHT click to select a color from an image with the dropper tool.
For all tools use the LEFT button held down to use the FGcolor and RIGHT button held down to use the BGcolor.
- Replacing one color with another
1 - Set the FGcolor to the old color and BGcolor to the new color
2 - Select the erase tool and keep right click pressed down to replace the old color with the new color.
- Palettes
To have a bigger choice of colors, you can double click on any color in the palette.
You can also open an image to select colors from it, or create a custom palette (choose a color, double click, screencapture the selector and cut out the gradient of colors that appears).
|
|
|
|
