How to Make Avatars, AIM Icons and FanListing Buttons
Templates to download
(Right click and save)
 How to make an icon: How to make an icon:
1 - Open the template, right click and choose copy
2 - Open your other image (one you wish to make an icon out of)
3 - Right click on this other image and choose paste
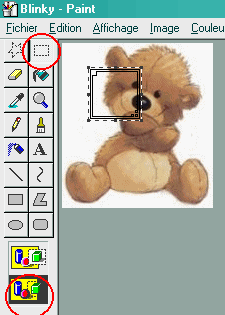
remember to select the cut out tool and "transparent" first - see image:
4 - Drag the template around until its in the right place then
5 - Click on the cut out tool again to merge both images
6 - Select round the template, cut it out and paste it on the template image (that you kept open earlier)
7 - Save as your new image: you can either choose to save it as bitmap and then make it into a gif with giffy (transparent the pink areas)
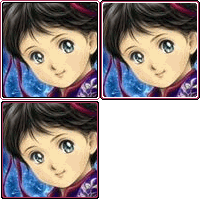
This is what mine looks like after a bit of editing (see the paint tutorial for more)

Transparented gif versions of the loveheart templates
 
Make a Button
Here are some templates for making buttons: (gif format)
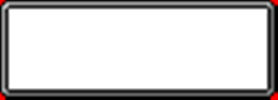
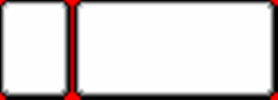
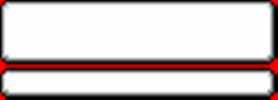
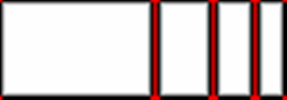
Please proceed as indicated in the above tutorial
Elements to be transparented are in red on the templates for easy use with Giffy
Many of the buttons use two different shades of grey in the inner borders: that is to make it look 3D: to maintain that effect remember to choose two different shades of the new colour you have chosen to replace the grey.
Examples of made and animated buttons:


Make and Animate a Blinkie
A Blinkie is made of blocks, icons and letters (props)
You can use MSpaint to create your own props or use an online blinkiemaker.
For this tutorial I'm going to use an online blinkiemaker.
- Once you've dragged and dropped the props where you want them, press printscreen (a button on your keyboard close to the F12 button, at the top right) and open MSPaint (or another image editor)
- Choose the select tool (the dotted rectangle), right click on the blank white space and choose 'paste' or simply press the hotkeys 'Ctrl+V'. Click for screencap
- Use the select tool to cut out your blinkie from the screencapture of the webpage, right click and choose 'copy' (or Ctrl+C) then paste it in to a new MSPaint image. Click for screencap
- Resize the image so it fits your blinkie and zoom in by 800% using the magnifying glass tool.
- Floodfill the areas to be transparent with a color not used in your blinkie, set that color as the background color by right clicking its square on the palette. Click for screencap
- Now save that first image as frame1.gif (or just 1.gif or a.gif) it will be the first frame of your blinkie animation.
Here's where we start to edit our blinkie for different animation effects...
I'm going to make a blinkie where the letters change color when the heart bounces on them:
5 letters in my name = 1 original frame + 5 changes = 6 frames named 'a' to 'f'
- Edit the original frame in mspaint and save the changes as the different frames. Click for screencap
     
- Convert the a-f.gif files to a-f.gif files using Giffy
     
- Load the a-f.gif files in Unfreeze, check that they are in the right order, set a frame delay (15). Click for screencap
- Save the new animation as 'heart.gif' --»

Here are some other animation effects you can create:
Dropping blocks:       --» --»  . Click for screencap . Click for screencap
Color swap:   --» --» 
Letters:       --» --»  or or  . .
Extra:
To add your blinkie to your website or blog, upload it to photobucket.com or imageshack.us and use the code that starts with <img src="...
How to make your own Kao-ani
There are ready made props online at the drag and drop kaomaker!
- Save a set of templates:
Save as gif format
1  2 2  3 3 
- Open up each one with MSpaint:
Colorize and add eyes (and other props if you want)
Make sure you put the eyes in the exact same place on each kao image.
To give your kao a cool background or 'skin' open up your favorite background in paint and paste your kao on top
- Save them as 1 to 3.gif and convert them to 1 to 3.gif using Giffy.
- Open Unfreeze and drag them in the correct order, set a time of animation (20ms) and save as kao.gif
Avatars
To customize your avatar:
1- Save your avatar to your computer, download giffy and change it into a bitmap.
2- Save a fancy avatar template to the same location.
3- Open them both in MSpaint.
4- Open a new MSpaint Session: Choose the Cut out feature and the transparent option
5- In the avatar window: choose the 'cut out' feature, select the avatar (CTRL+A then CTRL +C) then paste it into the new window (CTRL+V)
6- In the template window: select the template (CTRL+A then CTRL +C) then paste it into the new window (CTRL+V)
7- Save the new avatar made from combining both, as a bitmap (not as a gif because it will lose too many colours)
8- Open Giffy and convert your new bitmap avatar into a transparent gif (choose red-the corner colour as transparent)
Other options:
- To animate your avatar: download unfreeze and add the gif files you wish to put together as an animation.
- To add your name: download a pixel font and add your name with the text tool in MSpaint.
Fancy templates:
Anything in red needs to be transparented when you convert to a gif
 = = 
 = = 
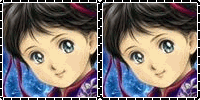
 + +  = = 
 + +  + +  = = 
Fancy templates 2:
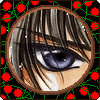
Anything in pink needs to be transparented when you convert to a gif
 = = 
 = = 
 = = 
 = = 
Little Extra Props:
Make a Blinkie Maker
Notice before you start
Make your OWN Images (also called 'props')
Remember to never steal someone elses images- that is really awful!
but you can save one or two to your computer to examine them and to learn how to make them.
You must NEVER EVER direct link! Store your own images and your blinkie maker will be more succesful!
This tutorial can also be used for making a dollz maker
I can not offer any more help than this by email.
Please understand that it is HTML ... It's fiddly and long to make .
You will need lots of patience!
Making, Converting and Naming each image one by one and then writing the HTML won't be done in 5 minutes!
1-Making the Images (see Blinkie Tutorial)
Make blocks, letters and icons with paint (bitmap format)
Make them into GIF format and the color white transparent with giffy
Make some ready made blinkieblocks (six blocks or more stuck together) for people to work on.
Name each prop with easy names like each block can be B1.gif or a yellow block would be Byellow.gif
Name each letter a.gif to z.gif
2-Making the HTML:
First of all, be aware that your page is going to be ALL in HTML....
But for those of you new to HTML- i'll try and make this very easy.
Open Notepad and make a new text file and name it "blinkie.html"
Now put all your Blinkie props in a folder on your computer and put the Blinkie HTML page in too.
Paste these first lines of code into the notepad page and save
[This is the skeleton of your page + the drag and drop javascript]
HTML Part 2
To make different areas for putting our props in ... we need to use TABLES
Here is the code for this table: paste it into your notepad blinkie page after the javascript.
Blocks
|
Premade
|
Letters
|
Icons
|
Building Space
|
HTML Part 3
After the table code, paste |
|
|
|
|


 --»
--»  .
. 
 --»
--» 


 --»
--»  or
or  .
.
 2
2  3
3 
 =
= 
 =
= 
 +
+  =
= 
 +
+  +
+  =
= 
 =
= 
 =
= 
 =
= 
 =
= 


